
Definitions
Stage Left and Right
- Stage Right: If you are standing on stage looking out at the bleachers, this is your right hand side
- Stage Left: If you are standing on stage looking out at the bleachers, this is your left hand side
Step 1: Stage Placement
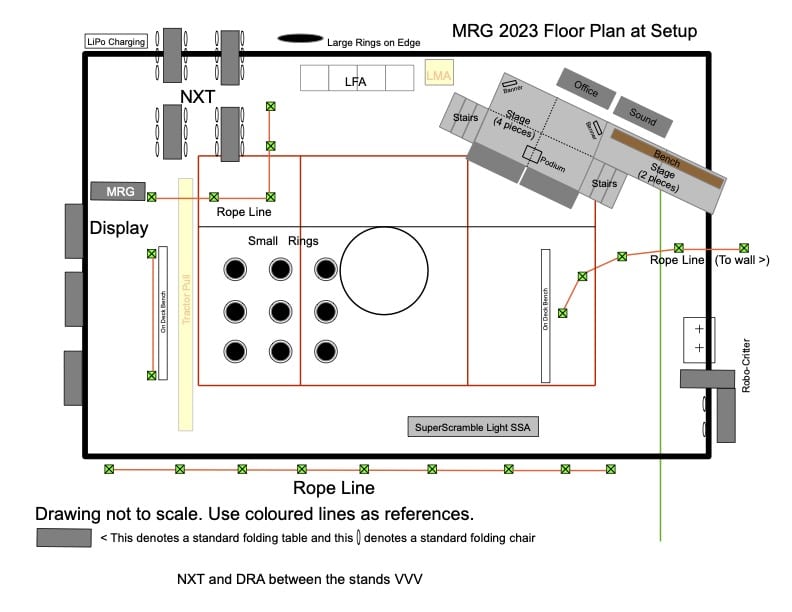
⚠The first item of business is to get the stage pieces into place on the floor before you put anything in the way of moving those large pieces.
The stage should be on site already. If, as often happens, the tools for assembly of the stage are not present (they may either be in the room under the pit area in a blue Rubbermaid Roughneck tote), place the stage sections on the floor upside down roughly where they are on the chart and place the legs in the receptacles. If the tools are present, assemble the stage and put it in place.
Step 2: Assembling the stage platform
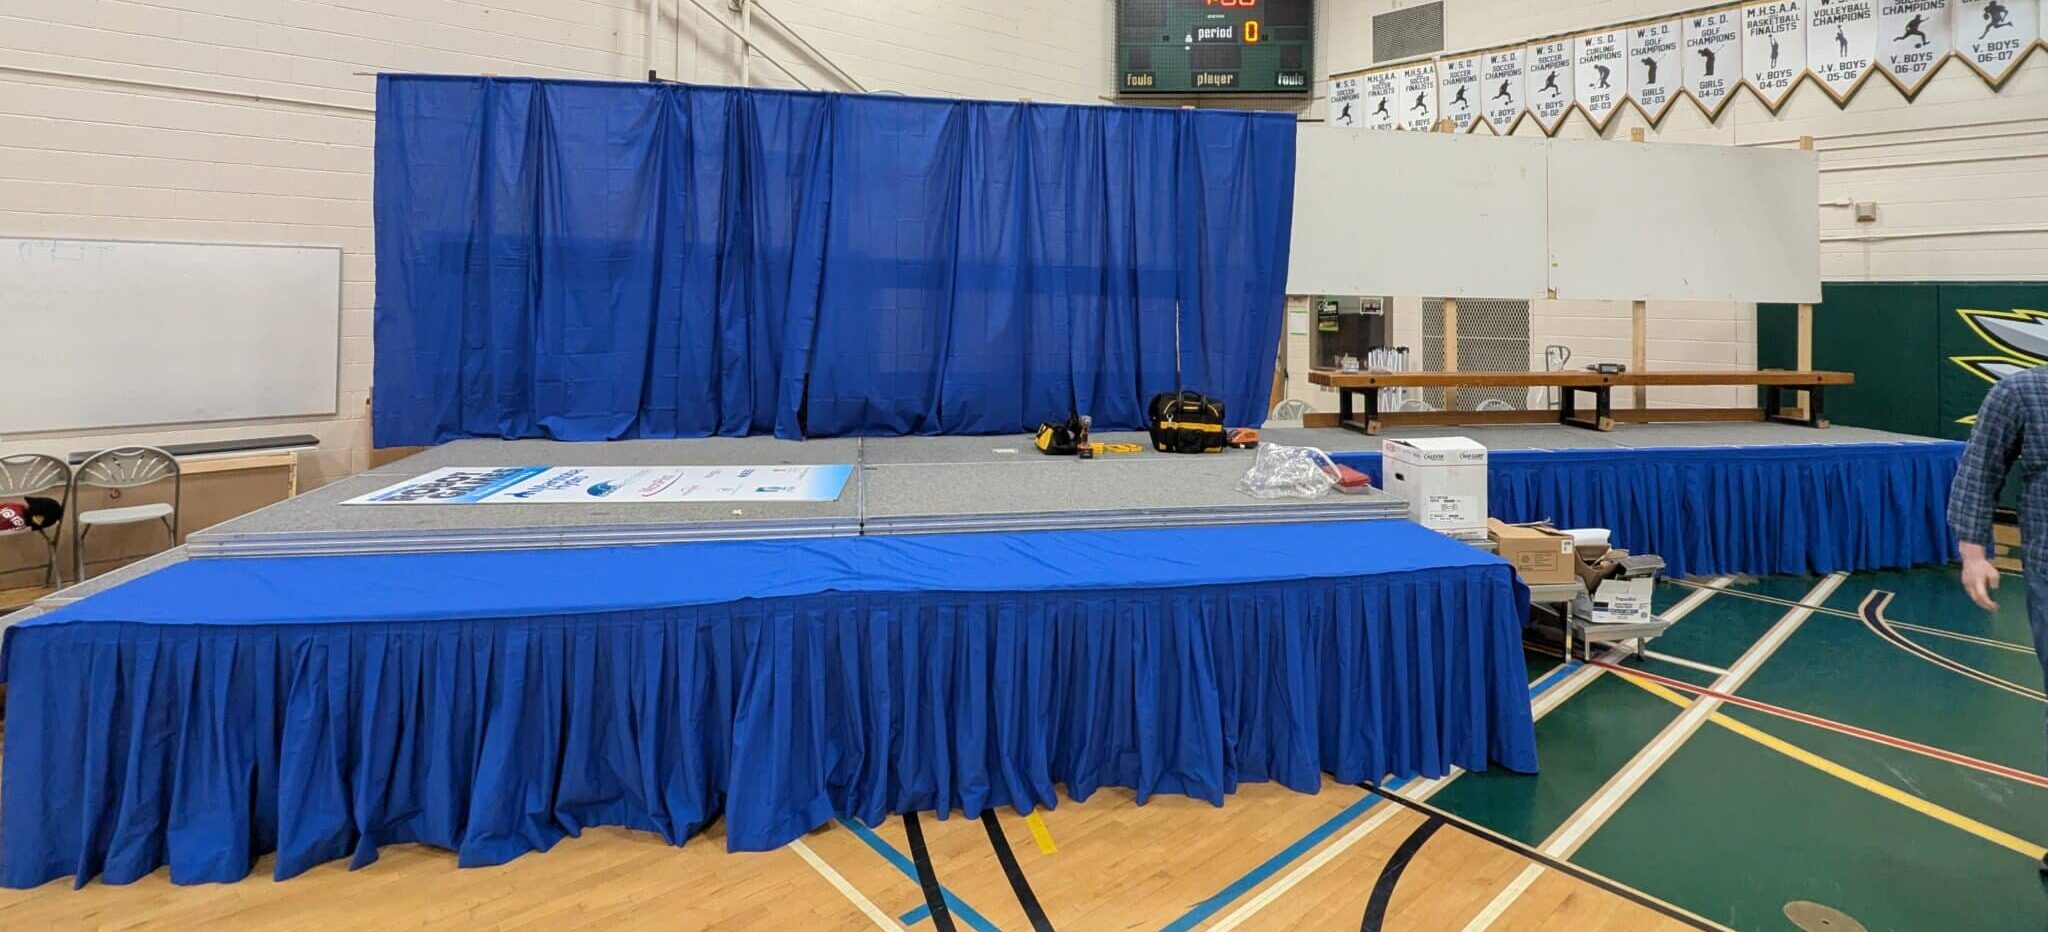
With the 6 stage pieces face down, insert the legs into the square collars at the corners and sides of each piece. Most are tightened with an Allen key but there are a few that have been changed to a hex bolt. When all have legs, turn them over and arrange as shown in the Floor Plan. Fasten the sections together with the clamps. At each end of the front half, attach the stair units and clamp them as much as possible. They are a bit unstable but make them as secure as possible.
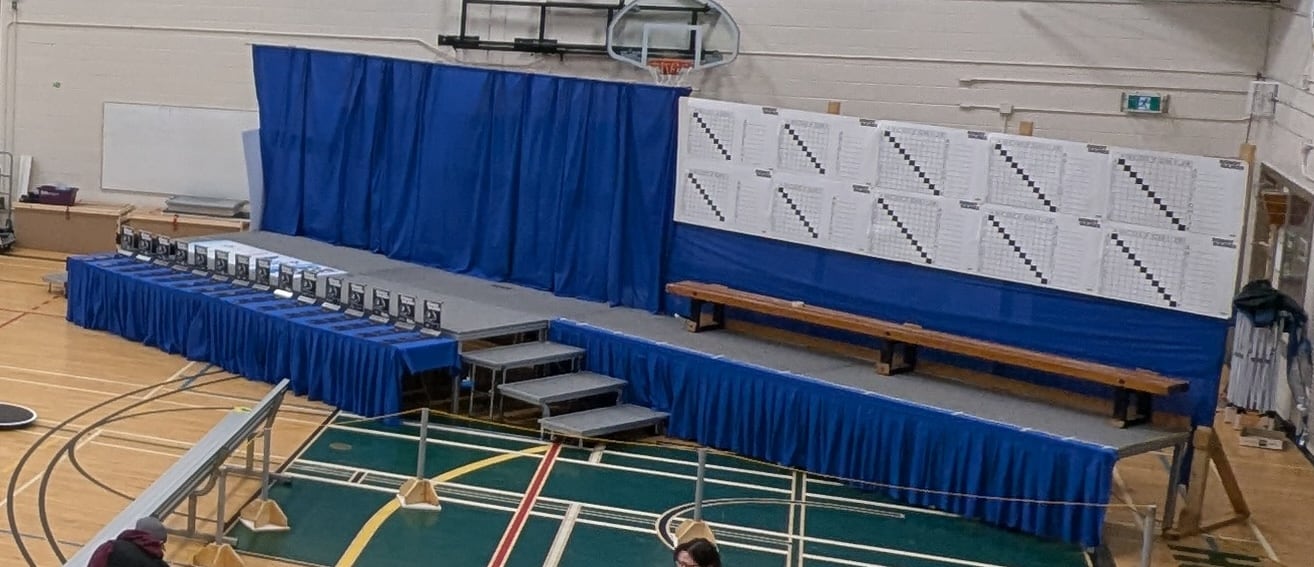
Step 3: Moving the bench
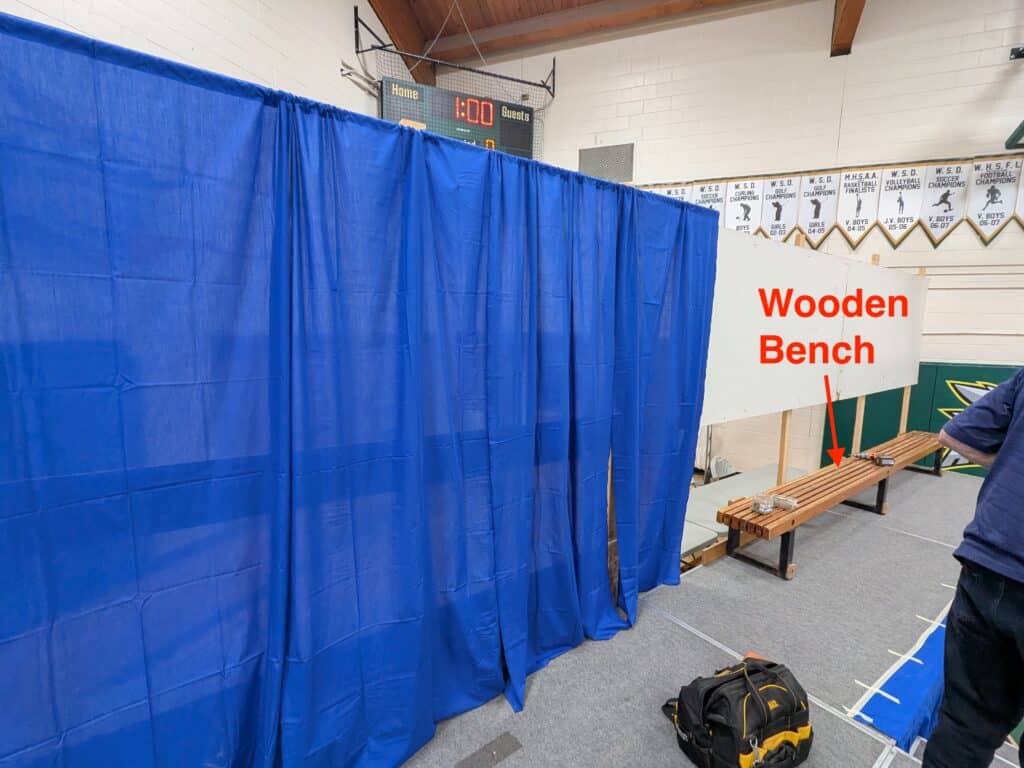
Moving the really heavy wooden bench is a four person job! It is usually found along the wall in the hallway outside the gym and goes on stage left under the scoreboards. It is helpful to stand on while screwing in the white boards.
Step 4: Assembling the backdrop
The 2 videos below show the assembled backdrop (without the scoreboard or curtains) from the back and front.
Above: Front and back of assembled backdrop before the curtains and scoreboard have been added.
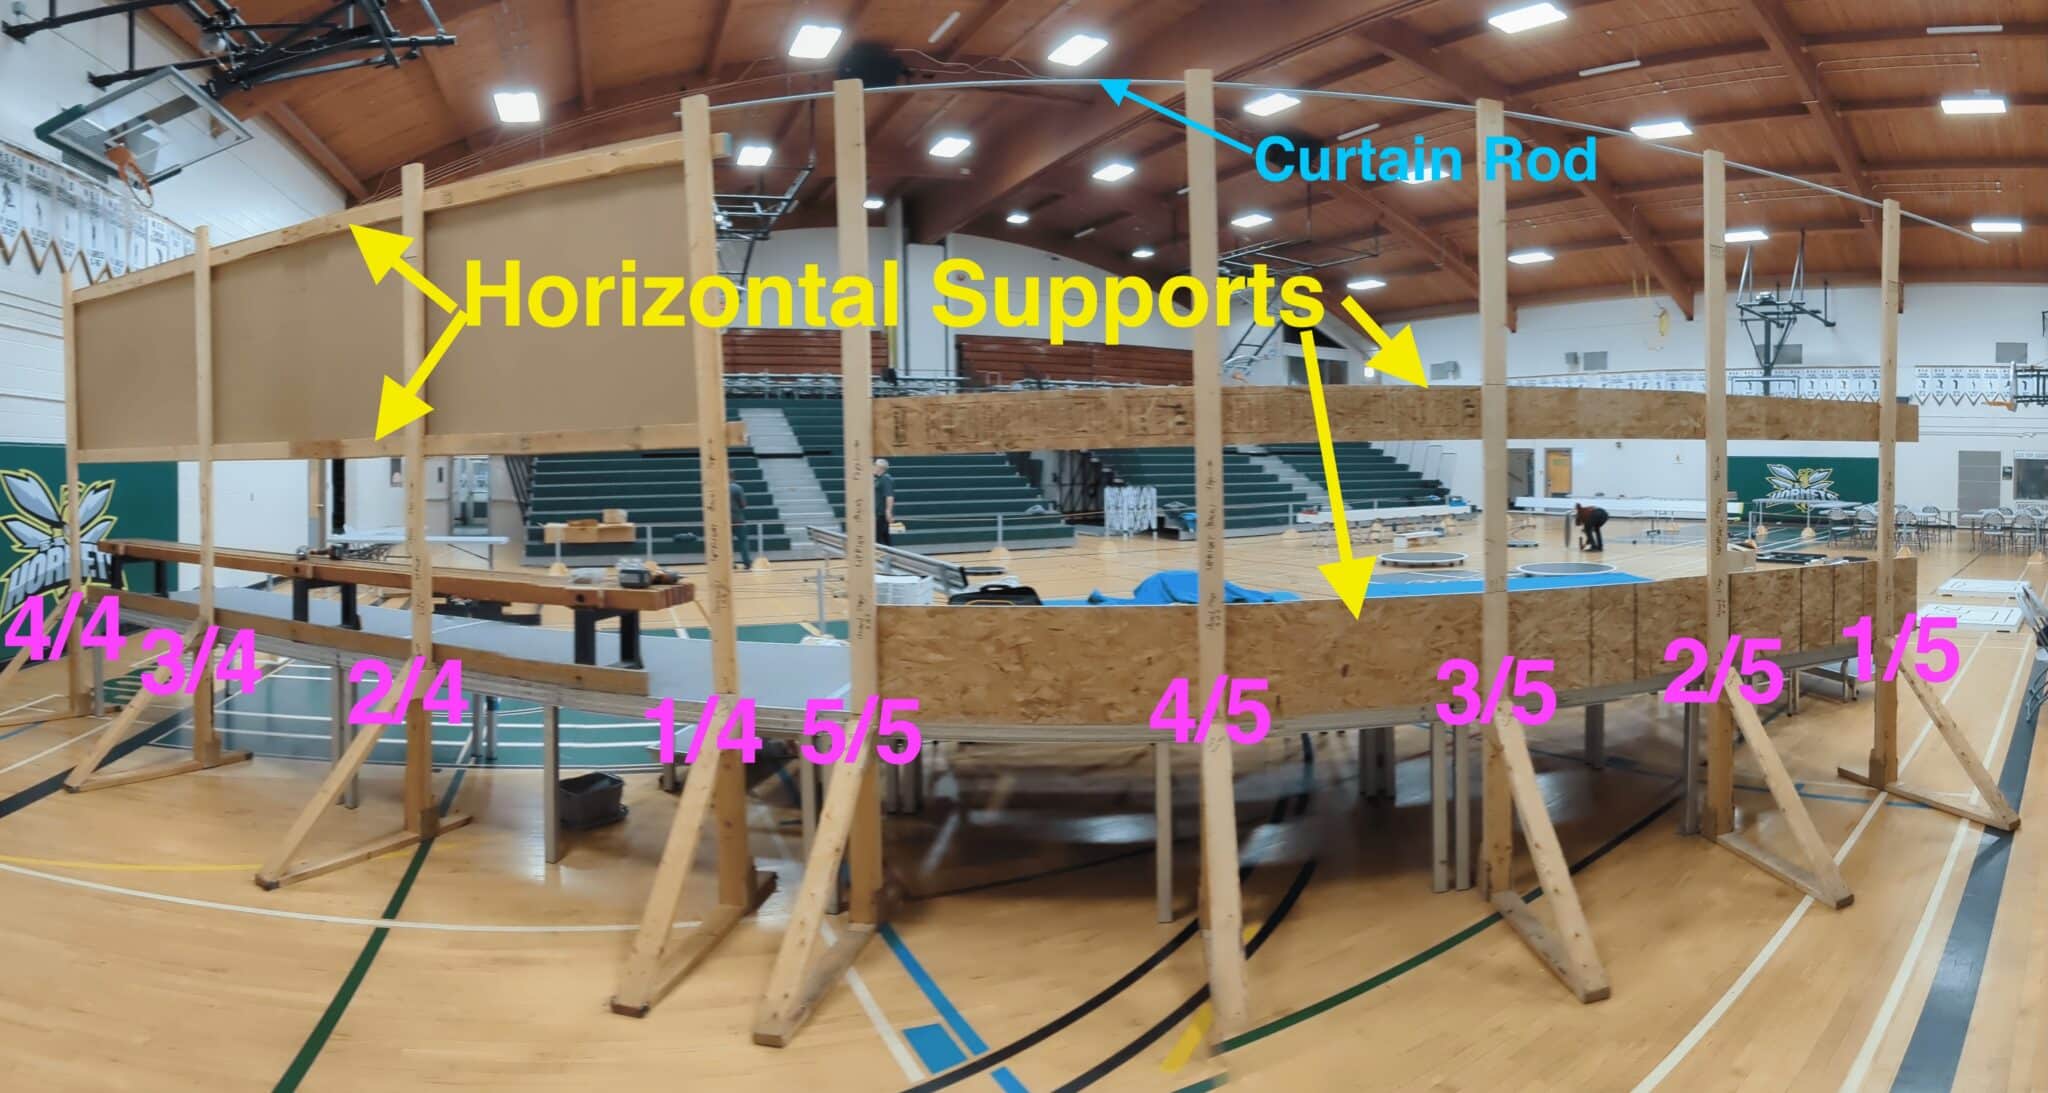
Backdrop Uprights
The backdrop and scoreboard are assembled from the triangle supports and the 2×4’s slotted upright into them. Use the above image to see the numbering and placement.
⚠ Supports will not stand up on their own so they must have human support until the horizontal supports are screwed together.
In order to make assembly easier, assemble supports 1/5 and 5/5 first with 2 people holding them. Place the bottom plywood horizontal support flush with 5/5 and screw it in.
Place support 1/5 against the inside of the rightmost stage right leg. Screw in the horizontal brace to 5/5. This will secure the frame and allow you to install supports 2-4 more easily. Do the same for supports 1/4 – 4/4 on the stage left side. Both horizontal sections will have a small overhang on the right sides. Finish by securing the middle supports of each section to the horizontal supports.
Step 5: Scoreboard
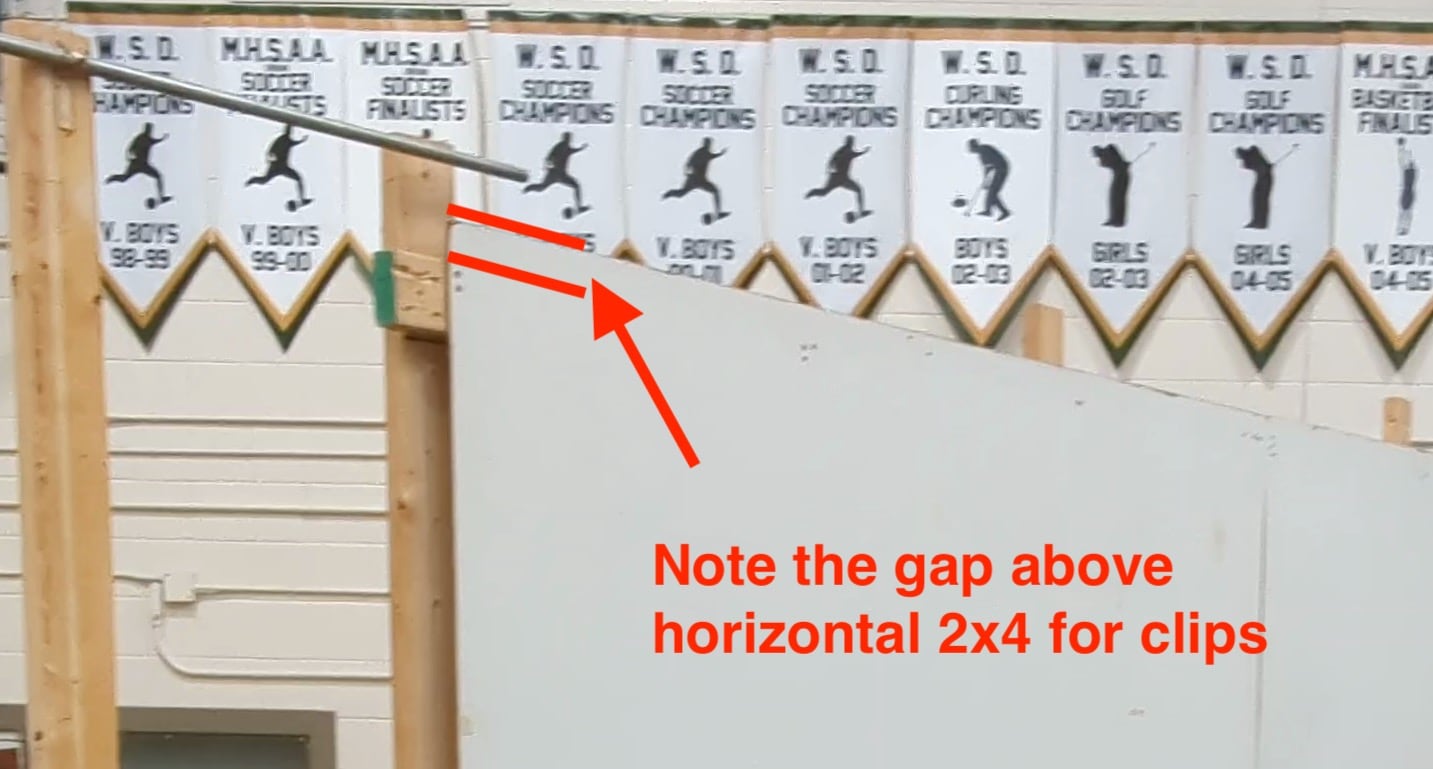
The scoreboard sheets are added to the stage left end first with 1″ round head screws starting on the top rail with the sheet protruding high about 1″
The white scoreboard sheet should overhang the bottom and top horizontal rails by an inch.
This will allow the paper sheets to be clamped to the scoreboard. Continue with the second sheet.
Step 6: Curtains
Affix the brackets
The “Z” brackets need to be affixed to the top of the upright supports 1-5. These will eventually hold the curtain rod in place.
Connect the pipes
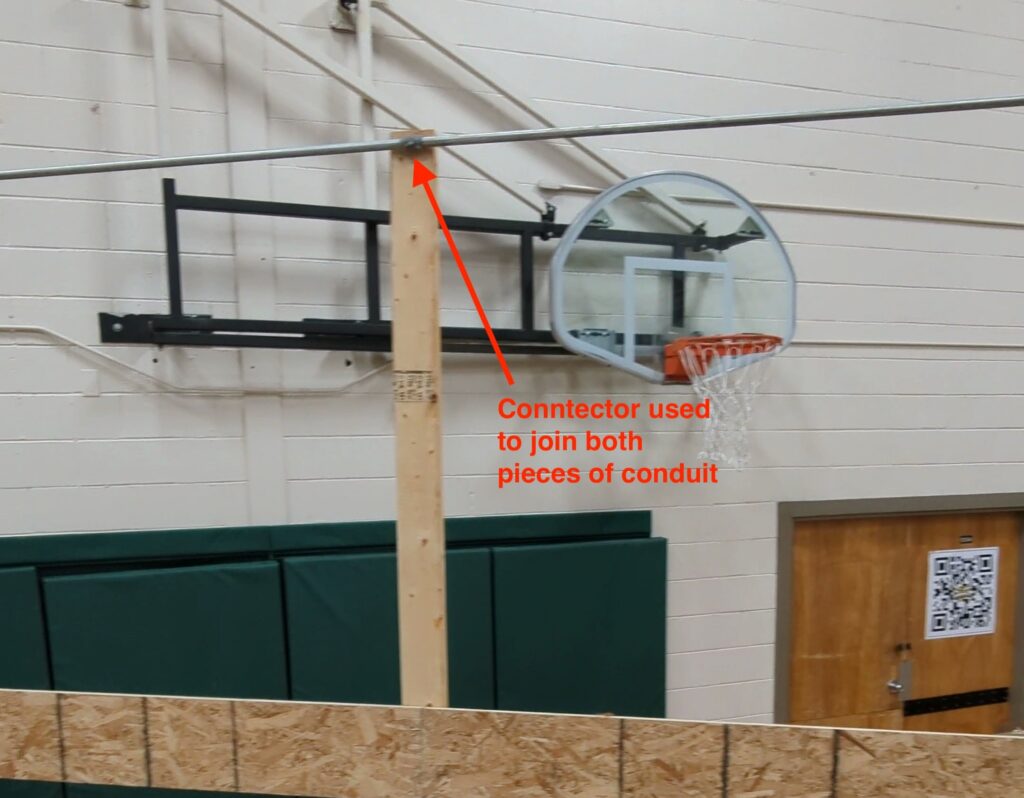
Connect the 2 metal pipes together with the twist connector at one end. Lay the assembled pipe across the stage as you will need 2-3 people to help with the next steps.
Slide the curtain on
The metal pipe should slide into the sewn pocket in the curtains. Once they are all on, hang the rod from the brackets we affixed earlier (most of you will be male and not have the drape hanging gene so try to get them looking like the waviness is relatively even across the whole length :).
Scoreboard curtain
This curtain sits below the scoreboard and will be pulled taught. Affix both sides using provided thumb tacks into the 2×4 uprights.
Banners
Place the two MRG banners at the back corners of stage right and un-roll them.
Front tables and bottom skirt
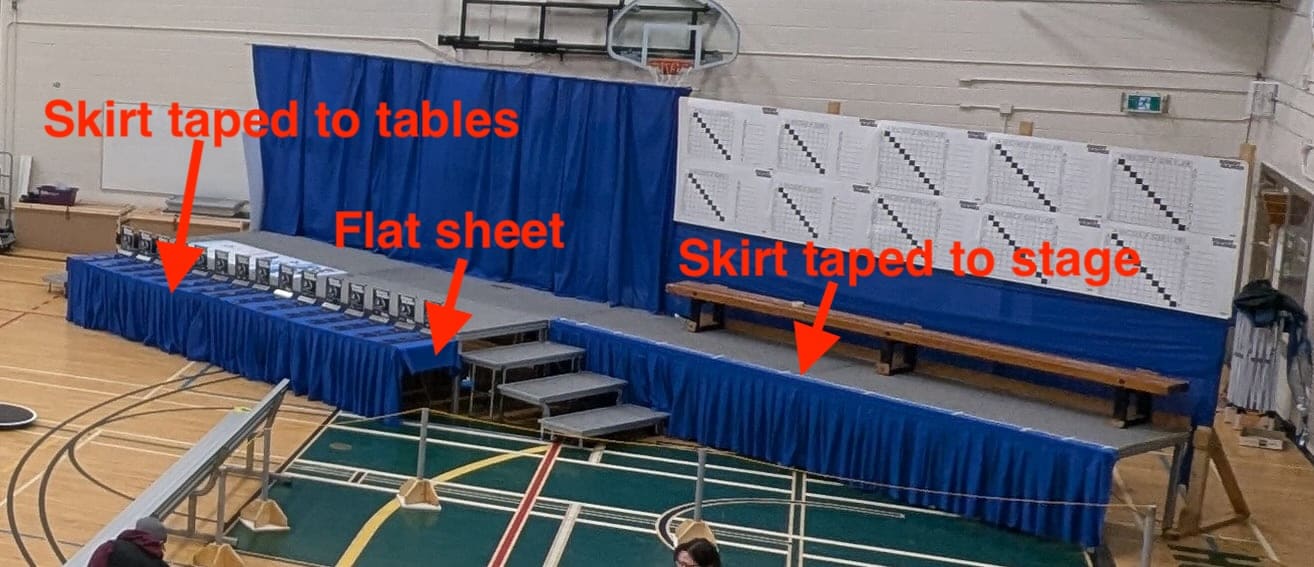
Run the skirt around the front of the table in front of the stage. You can affix the skirt to the table using masking tape. Also, run the skirt around stage left and also use masking tape to affix to the stage.
Finally, place the flat blue sheet over the front trophy table to cover up the top and the masking tape. This is where the trophies will go first thing on game day.