
Thank you for volunteering at the Manitoba Robot Games!
This page will give you the information you need to volunteer with the registration process. Please inform an executive committee member if you have any questions or suggestions.
Registration Process
There are two stations each competitor must go through to check-in their robot for the competitions:
- Check-in – confirm online registration, check/correct information and initial as verification, accept payment, issue receipt and wristband, mark as paid.
- Measurement: Jigs & Scales – check size and weight requirements (and any timing requirements – e.g. for autonomous robots).
Ring Assignment – Previously a third station, ring assignment is now done on the main computer a competition’s registration has closed. Competitors are provided their ring assignments by the judges when they report at competition start.
Check-in Station
Equipment that will be at the Check-in station:
- cash box
- receipt book, pens, highlighter
- participant payment sheet
- blank router sheets (example <broken link>), pad of paper
- wristbands
- games schedule, whiteboard, stand, markers
- a set of weight/size stickers (may be at Measurement)
Competitors will check in here first, and should bring their printed router sheet.
Prior to Opening Check-in Station
- Set up whiteboard on stand, add registration start and end times for each competition
- Post large poster of games schedule on wall at front end of registration desk
- Count cash float and organize cash tray
- Complete appropriate sections of receipts (Date, receipt #, payment to ‘Manitoba Robot Games’, etc)
I. Confirmed Competitors Procedure
When a confirmed competitor comes to the Check-in desk, the following steps are to be used.
- Identify the Robot – Competitors should have a router sheet printed from their own computer. If not, ask the competitor his/her robot’s name.
- Locate the robot on the registration system.
- Ask the competitor to view and confirm accuracy of all information.
- If all information is correct, initial the router sheet to indicate verification.
- If corrections to the robot’s/competitor’s information are required, correct any errors (any corrections should have been made before receiving confirmation, but errors/changes do happen). If a correction is required, update the electronic system, make changes to the router sheet, highlight changes, and initial it to indicate verification.
- Direct the competitor to the next station for payment.
- Take Payment – The registration system will indicate the amount owing by the competitor. Accept payment and place the money/cheque in the cash box provided. Cheques are to be made out to ‘Manitoba Robot Games‘
- BULK PAYMENT-It is possible that a teacher will be making a payment for a number of students, and possibly in a variety of competitions, with one cheque (“bulk payment”), so payment for individual robots may be deferred until later – in which case do NOT mark as “Paid” in the registration system. The coaches should have a list of all robots for which they are paying. Write the school’s name on a piece of note paper & indicate each robot that is checked in (as they are checked in) for each category, e.g. 5 MST + 1 PSA + 1 TP. The coach can pay the total amount for all school robots at a break in the registration period, later. Be sure to bring this to the attention of the executive committee member that is supervising the registration.
- Mark as Paid – If the competitor has paid the fee, mark as paid in the registration system and on the router sheet. Direct the competitor to the next station for a wristband and receipt (if desired).
- Issue a receipt to the competitor (if desired), and to the teacher/supervisor (most school group leaders will need one).
- Give a wristband to each competitor/team member(s) and one coach associated with that robot. Wristbands are only for the builders & operators of the robot, not for parents, siblings, or friends. Coaches may also get a wristband, but not coaches’ family.
Note: the wristbands allow access to a secure & potentially dangerous area. We wish to limit access to only those who need to be there. - (Volunteer dependent) – A sticker needs to be applied to each robot. This will either be performed at the Check-In or Measurement station, depending on the availability of volunteers.
- Ask the competitor to move to the Jigs and Scales table for measurement.
II. Walk-Ups Registration Procedure
When an unregistered (walk-up) competitor comes to the Check-in desk, the following steps are to be used.
- The number of players we can take has been predetermined for each event. Contestants have already been placed into the slots available. <<<add instructions for determining which events can take any additional entries & how many, using the registration system.>>>
- Once you have determined that the robot can be accommodated in the competition, have the contestant fill out a blank router sheet by hand. Enter the robot into the empty space allowed in the computer registration system (spreadsheet).
- Continue from step 4 of the instructions for Confirmed Competitors.
III. No-Shows & Scratches
We will not be filling no-show & scratch spots after an event’s registration closes, since it will delay the match starts. Competitors in these matches will be getting a bye to the next round.
Measurement Station: Jigs and Scales
Robots must be weighed & measured to ensure compliance with the requirements.
Your station will have the following basic equipment:
- An electronic scale,
- a labeled acrylic box (called a jig) or a mylar band,
- a set of weight/size stickers (may be at Check-In),
- a package of coloured ¼ -inch circle stickers, and
- a list of the weight restrictions for the various robots.
Prairie Sumo Tethered Registration also includes:
- A long jig for measuring Prairie Sumo tethers,
- coloured tape,
- scissors,
- elastic bands, and
- a scratch board (explanation below).
Mini Sumo Autonomous Registration also includes:
- a stopwatch, and
- a wooden block
The stickers for autonomous robots are different because there is one more step (time delay) to check them in. There will be a sample later.
Size and Weight Specifications (including onboard batteries)
| Event |
Size |
Weight |
| Mini Sumo – All |
No Size Limit |
Under 500 g |
|
Prairie Sumo – All |
Circumference Band (1 m) |
Under 3 kg |
|
Tractor Pull |
Jig (355 mm long, 252 mm wide) |
10 pounds (4.536 kg) |
|
Super Scramble Rookie |
Must use MRG kit tracks, gearbox and controller and be less than 17 cm high |
Under 750 g |
|
Super Scramble L , Super Scramble H |
Circumference Band (1 m) “ |
Light – Under 750 g, Heavy – under 3 kg |
|
Line Follower S & K |
20 cm wide |
No limit on weight |
|
Line Maze |
15 cm x 15 cm |
No limit on weight |
|
Drag Race |
20 cm wide, 30 cm long, |
Under 2 kg |
|
Lego Mindstorms NXT |
As per the supplied pre-built Lego Mindstorms |
No limit on weight |
|
Judges Choice |
Maximum 89 cm wide |
22.5 kg / axle |
Typical Procedure
The fact that a robot complies with the various requirements is denoted with a label that is applied to the robot. The label is then marked with additional stickers to note compliance. This procedure details the application of that label.
- A competitor will bring their robot to the table. Check for the current year’s sticker, and apply if missing (may have been done at Check-In). If applying the sticker to a metal surface, a degreasing wipe may be required first.
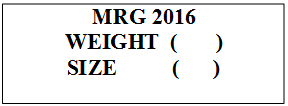
Example weight and size sticker - Ask the competitor if they use Li-Po batteries and apply orange stickers to both the robot and all battery pack(s) if so.
- Weigh the robot on the scale. If the robot is overweight the competitor must go to the pit area & remove some weight. If the robot is too light & the competitor chooses to add weight, the robot must be reweighed before the label can be applied. Controller and cable are not included in the weight limit. If the battery pack is on the robot during the competition, it must be weighed with the robot.
- When weight restriction is met, place a sticker in the bracket beside the word WEIGHT on the weight/size label.
- Measure the size of the robot:
- Using a Jig: Robot is placed in the jig (an acrylic box) or measured. The controller is fed up through the box first. Then the box is lowered over the robot. The jig must fit completely over the robot. There is no height restriction. If the robot does not fit, the competitor must go to the pit area to make adjustments & return to be measured again.
- Using a Circumference Band: The circumference band is wrapped completely around the robot. It must close. If the robot does not fit, the competitor must go to the pit area to make adjustments & return to be measured again. It may be necessary to place the robot on blocks prior to measurement to ensure the band sits properly around the circumference.
- When the robot fits into the jig or band, a sticker is placed in the bracket beside the word SIZE on the weight/size label.
- When both weight & size have been passed:
- mark the robot as “Measured” in the registration system, and
- inform them that they will receive their ring assignment when the competition is called.
Special Circumstances
- Robot only meets 1 requirement:
- Give the participant the label with the one requirement marked. Send him/her to the pit to make adjustments. Inform the competitor to return directly to this station. When he/she returns, recheck the robot for the missing requirement & add the appropriate sticker to the label if it is now correct. Registration is not complete until all requirements are met.
- Mini Sumo and Line Follower:
- Mini sumo has no size limit and line follower has no weight limits. For competitors with walk-up stickers, mark all spots on the label so that the judges know all the requirements are met.
- Prairie Sumo Tethered:
- Do this part first as there is no procedure later in the registration process to verify that it passes: The robot must not scratch the playing field. A rectangle of playing field material is at your station. Place the robot on it & push the robot back & forth to see if it scratches. If it does, send the student to the pit area to repair the offending area. If it passes, proceed with weighing & measuring. Do not issue a sticker until it passes the scratch test.
- A loop is required in the tether. Before registration starts, cut several pieces of coloured tape & apply loosely to the table so they can easily be taken off to apply to the tether. Have the student hold out his tether over the acrylic measuring device. This device equals the measurement of the loop. Wrap a piece of coloured tape around the tether at each end of the jig. Give the student a small elastic band & instruct them to use it to hold the loop on the coloured tape. If they ask why: The coloured tape allows the judge to easily see if the robot has been given a “power assist” by the operator since the elastic band will move below the line of the tape if the tether is yanked.
- Mini Sumo Autonomous:
- There must be a five second delay from the start signal until any motion of the robot occurs. Use a stopwatch or digital watch to time this. Explain the procedure to the student. You may use a countdown so you both start at the same time. If the robot passes, initial in the bracket underneath DELAY.
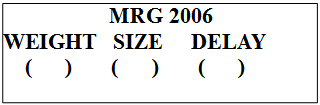
Autonomous weight size and delay sticker. - The robot should be able push the wooden block provided. If not, strongly encourage them to add weight.
- There must be a five second delay from the start signal until any motion of the robot occurs. Use a stopwatch or digital watch to time this. Explain the procedure to the student. You may use a countdown so you both start at the same time. If the robot passes, initial in the bracket underneath DELAY.